Google Workspace SAML integration
To begin with the integration process, Login to the Google Workspace Admin Portal.
Step 1: Add custom SAML app.
-
In the Admin console, go to Menu > Apps > Web and mobile apps.
-
Click Add App > Add custom SAML app.
-
Enter App Details
-
Enter the App name and Description.
-
Optionally, upload an icon for your app.
-
Click Continue.
-
-
On the Google Identity Provider details page, Download the IDP metadata file. This file will be needed later in the Enpass Admin Console to complete SAML configuration and then Click Continue.
-
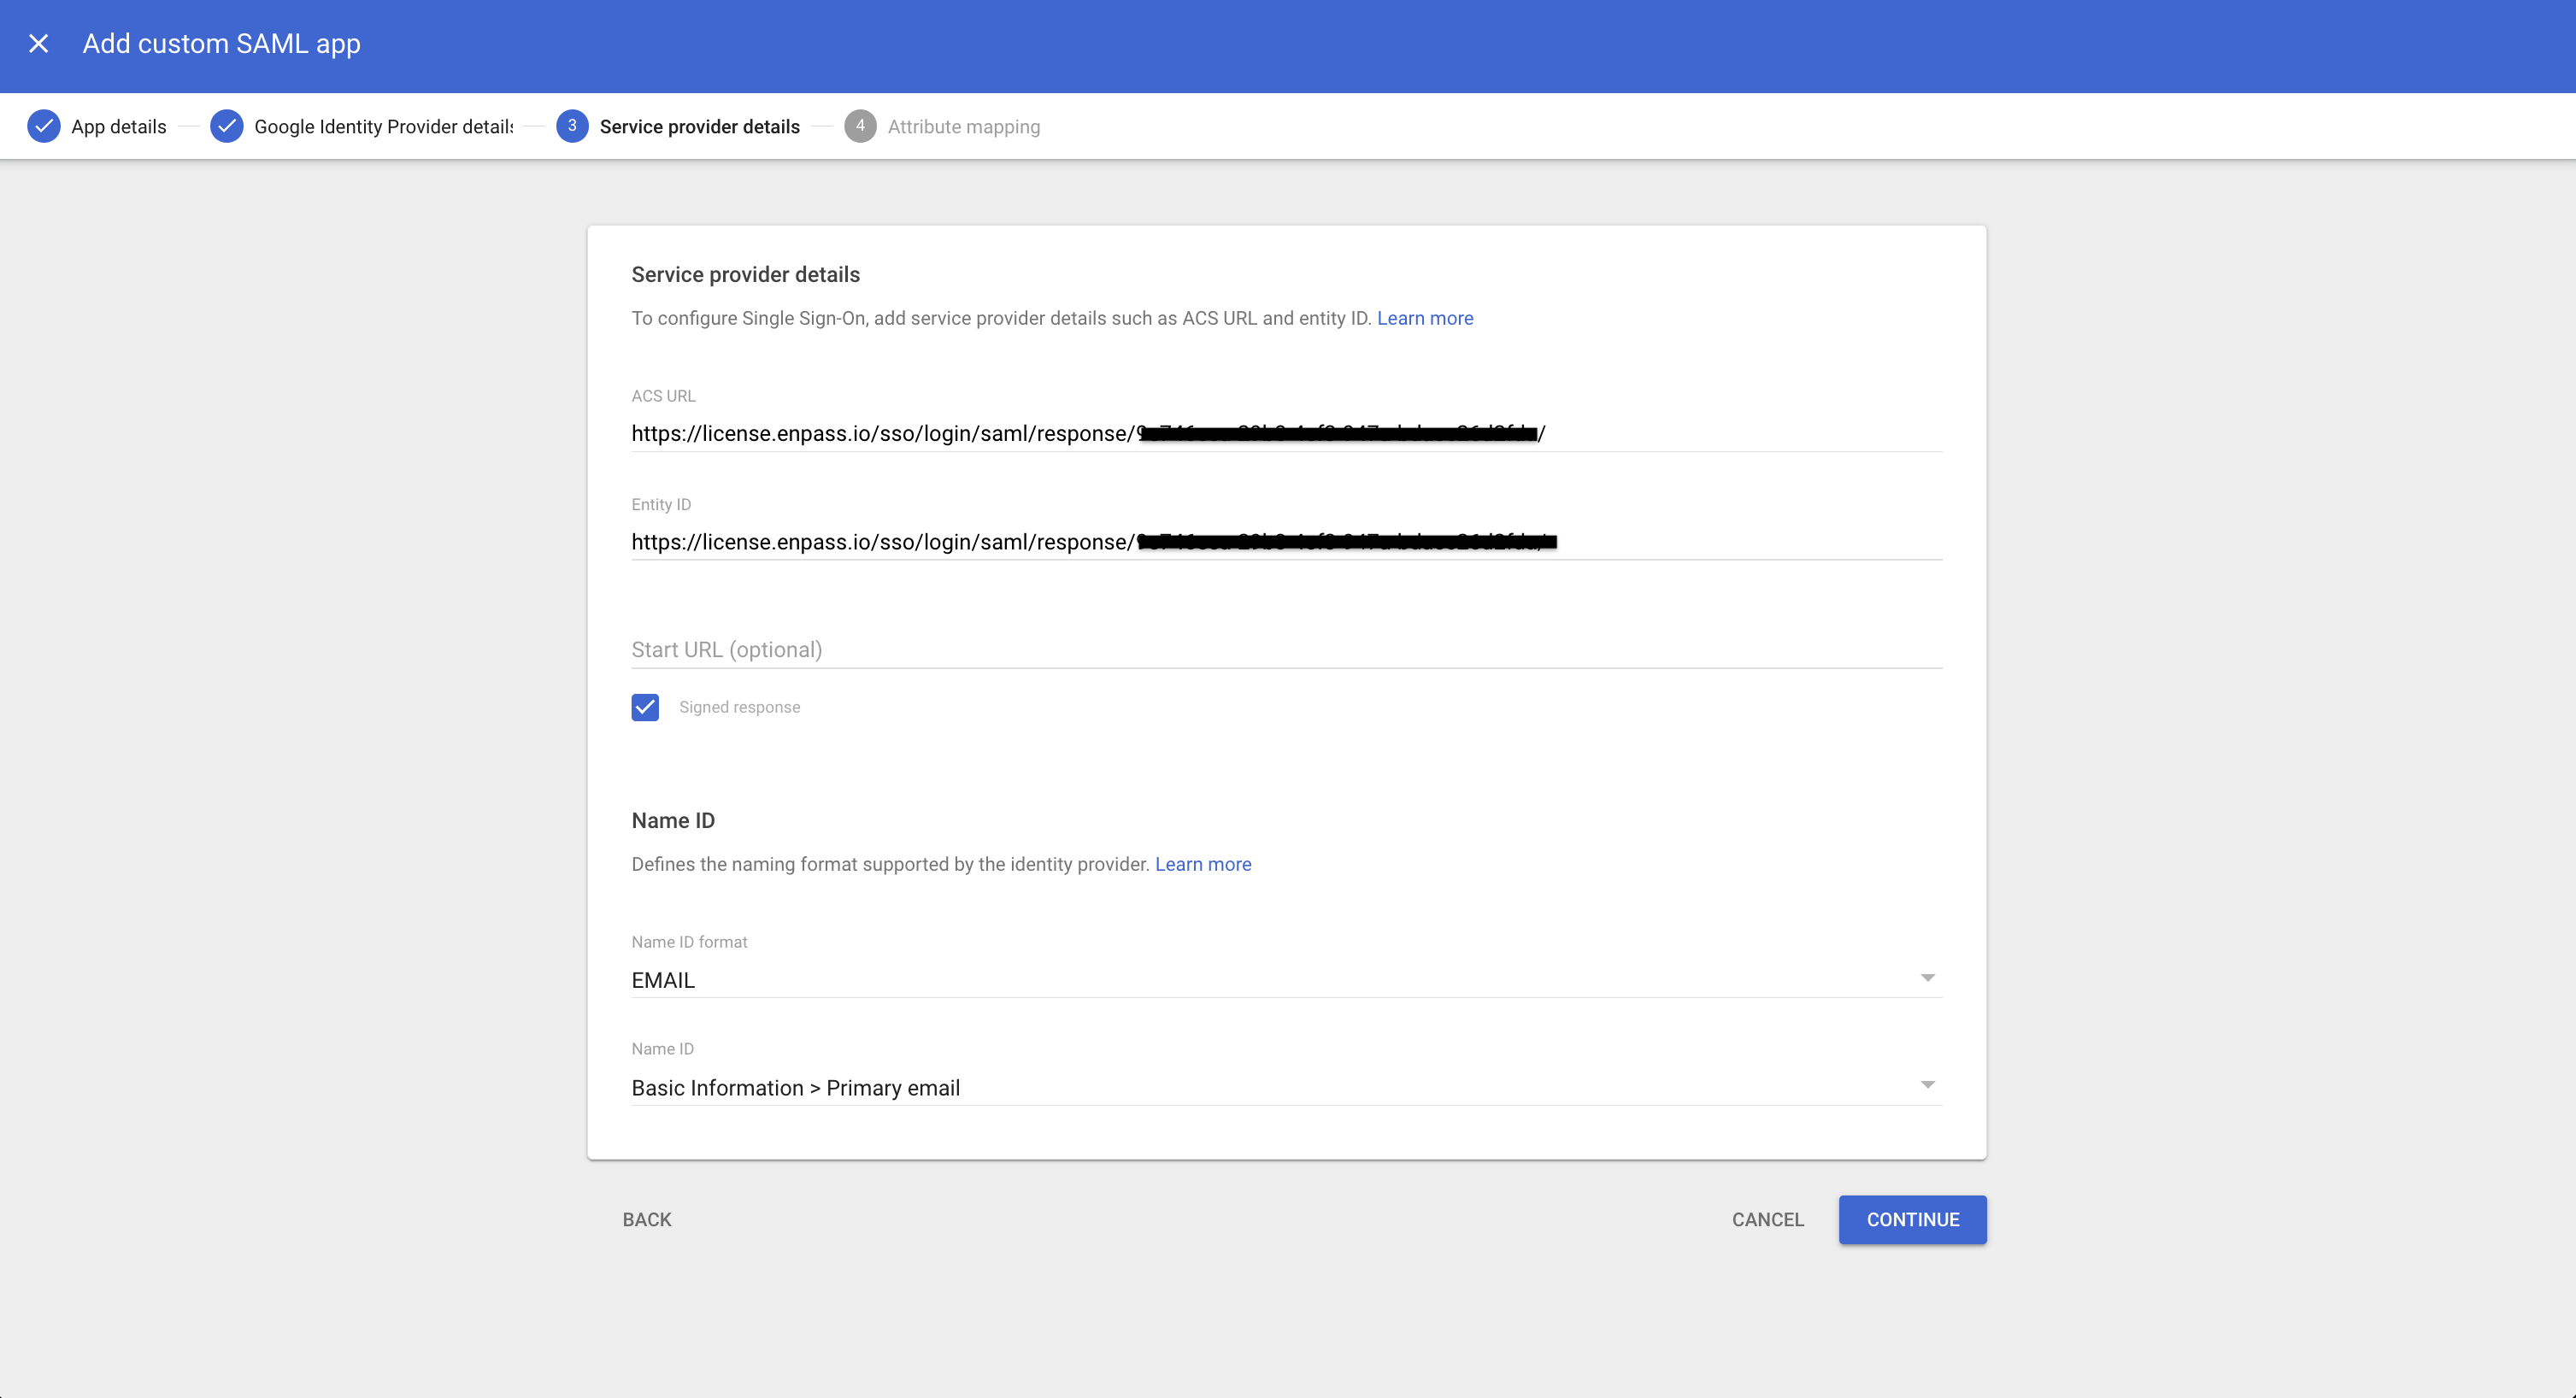
In the Service Provider Details window:
-
Enter the Entity ID and ACS URL (Assertion Consumer Service URL) as provided by the Enpass Admin Console during setup.
-
Select the checkbox for Signed response to ensure the SAML authentication response is signed.
-
Set the Name ID format to EMAIL and the Name ID value to Primary email.
-
Click Continue.
-
-
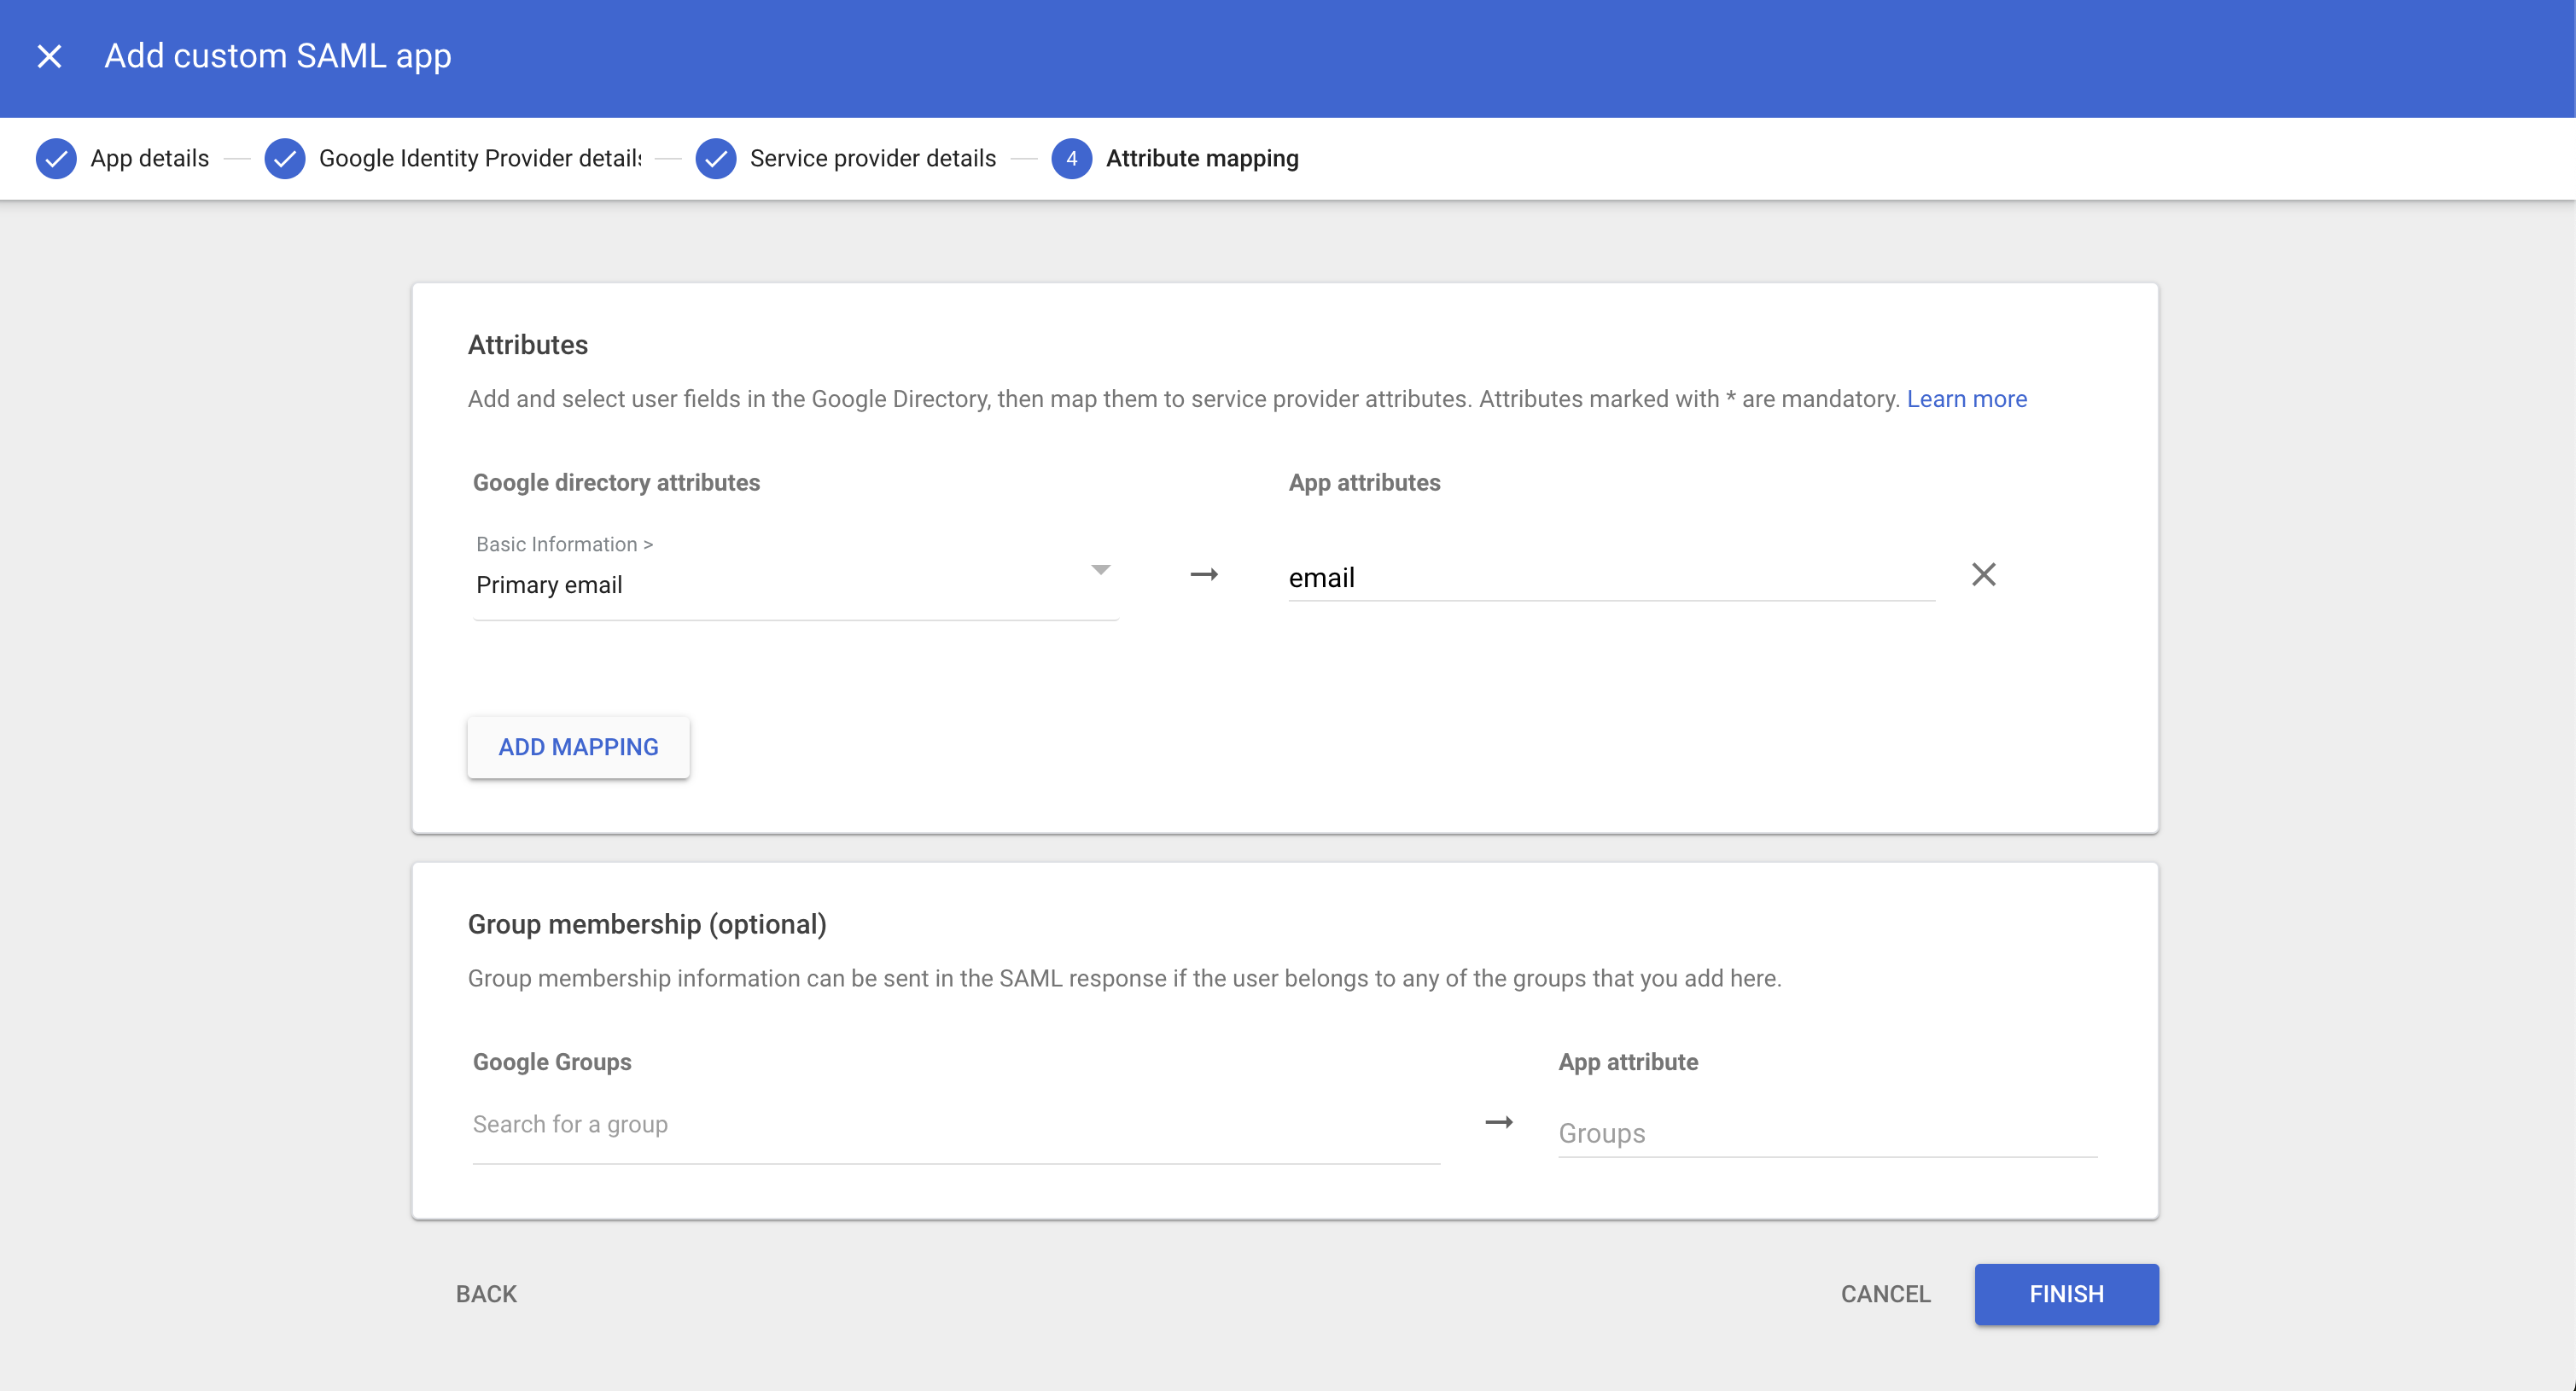
Map User Attributes
-
For Google Directory attributes, click the Select field menu and choose Primary Email.
-
For App attributes, enter Email as the corresponding attribute for your custom SAML app.
-
-
Click Finish to complete the app setup.
Step 2: Enable User Access
All administrators of the Enpass Admin Console should be assigned to this application to enable SSO login.
-
Click User access.
-
Assign Enpass admin console users to the application.