Microsoft Entra ID SAML integration
To begin with the integration process, Login to the Microsoft Entra ID Portal.
Step 1: Create an Enterprise Application
To create the Enpass application in your Entra ID portal, follow these steps:
-
In the Microsoft Entra ID portal, select Enterprise Applications from the sidebar.
-
Click New Application > Create your own application.
-
Enter a name for your application (e.g., "Enpass SSO").
-
Select Integrate any other application you don’t find in the gallery (Non-gallery).
-
Click Create.
Once the application is created:
-
In the sidebar, select Single sign-on.
-
Choose SAML as the single sign-on method.
Step 2: Set up Single Sign-On with SAML
Configure SAML Configuration
-
Under Basic SAML Configuration, click Edit.
-
Add the Identifier (Entity ID) and Reply URL (Assertion Consumer Service URL) as provided by Enpass Admin Console.
-
Click Save.
-
Click on the Close icon on the right top corner.
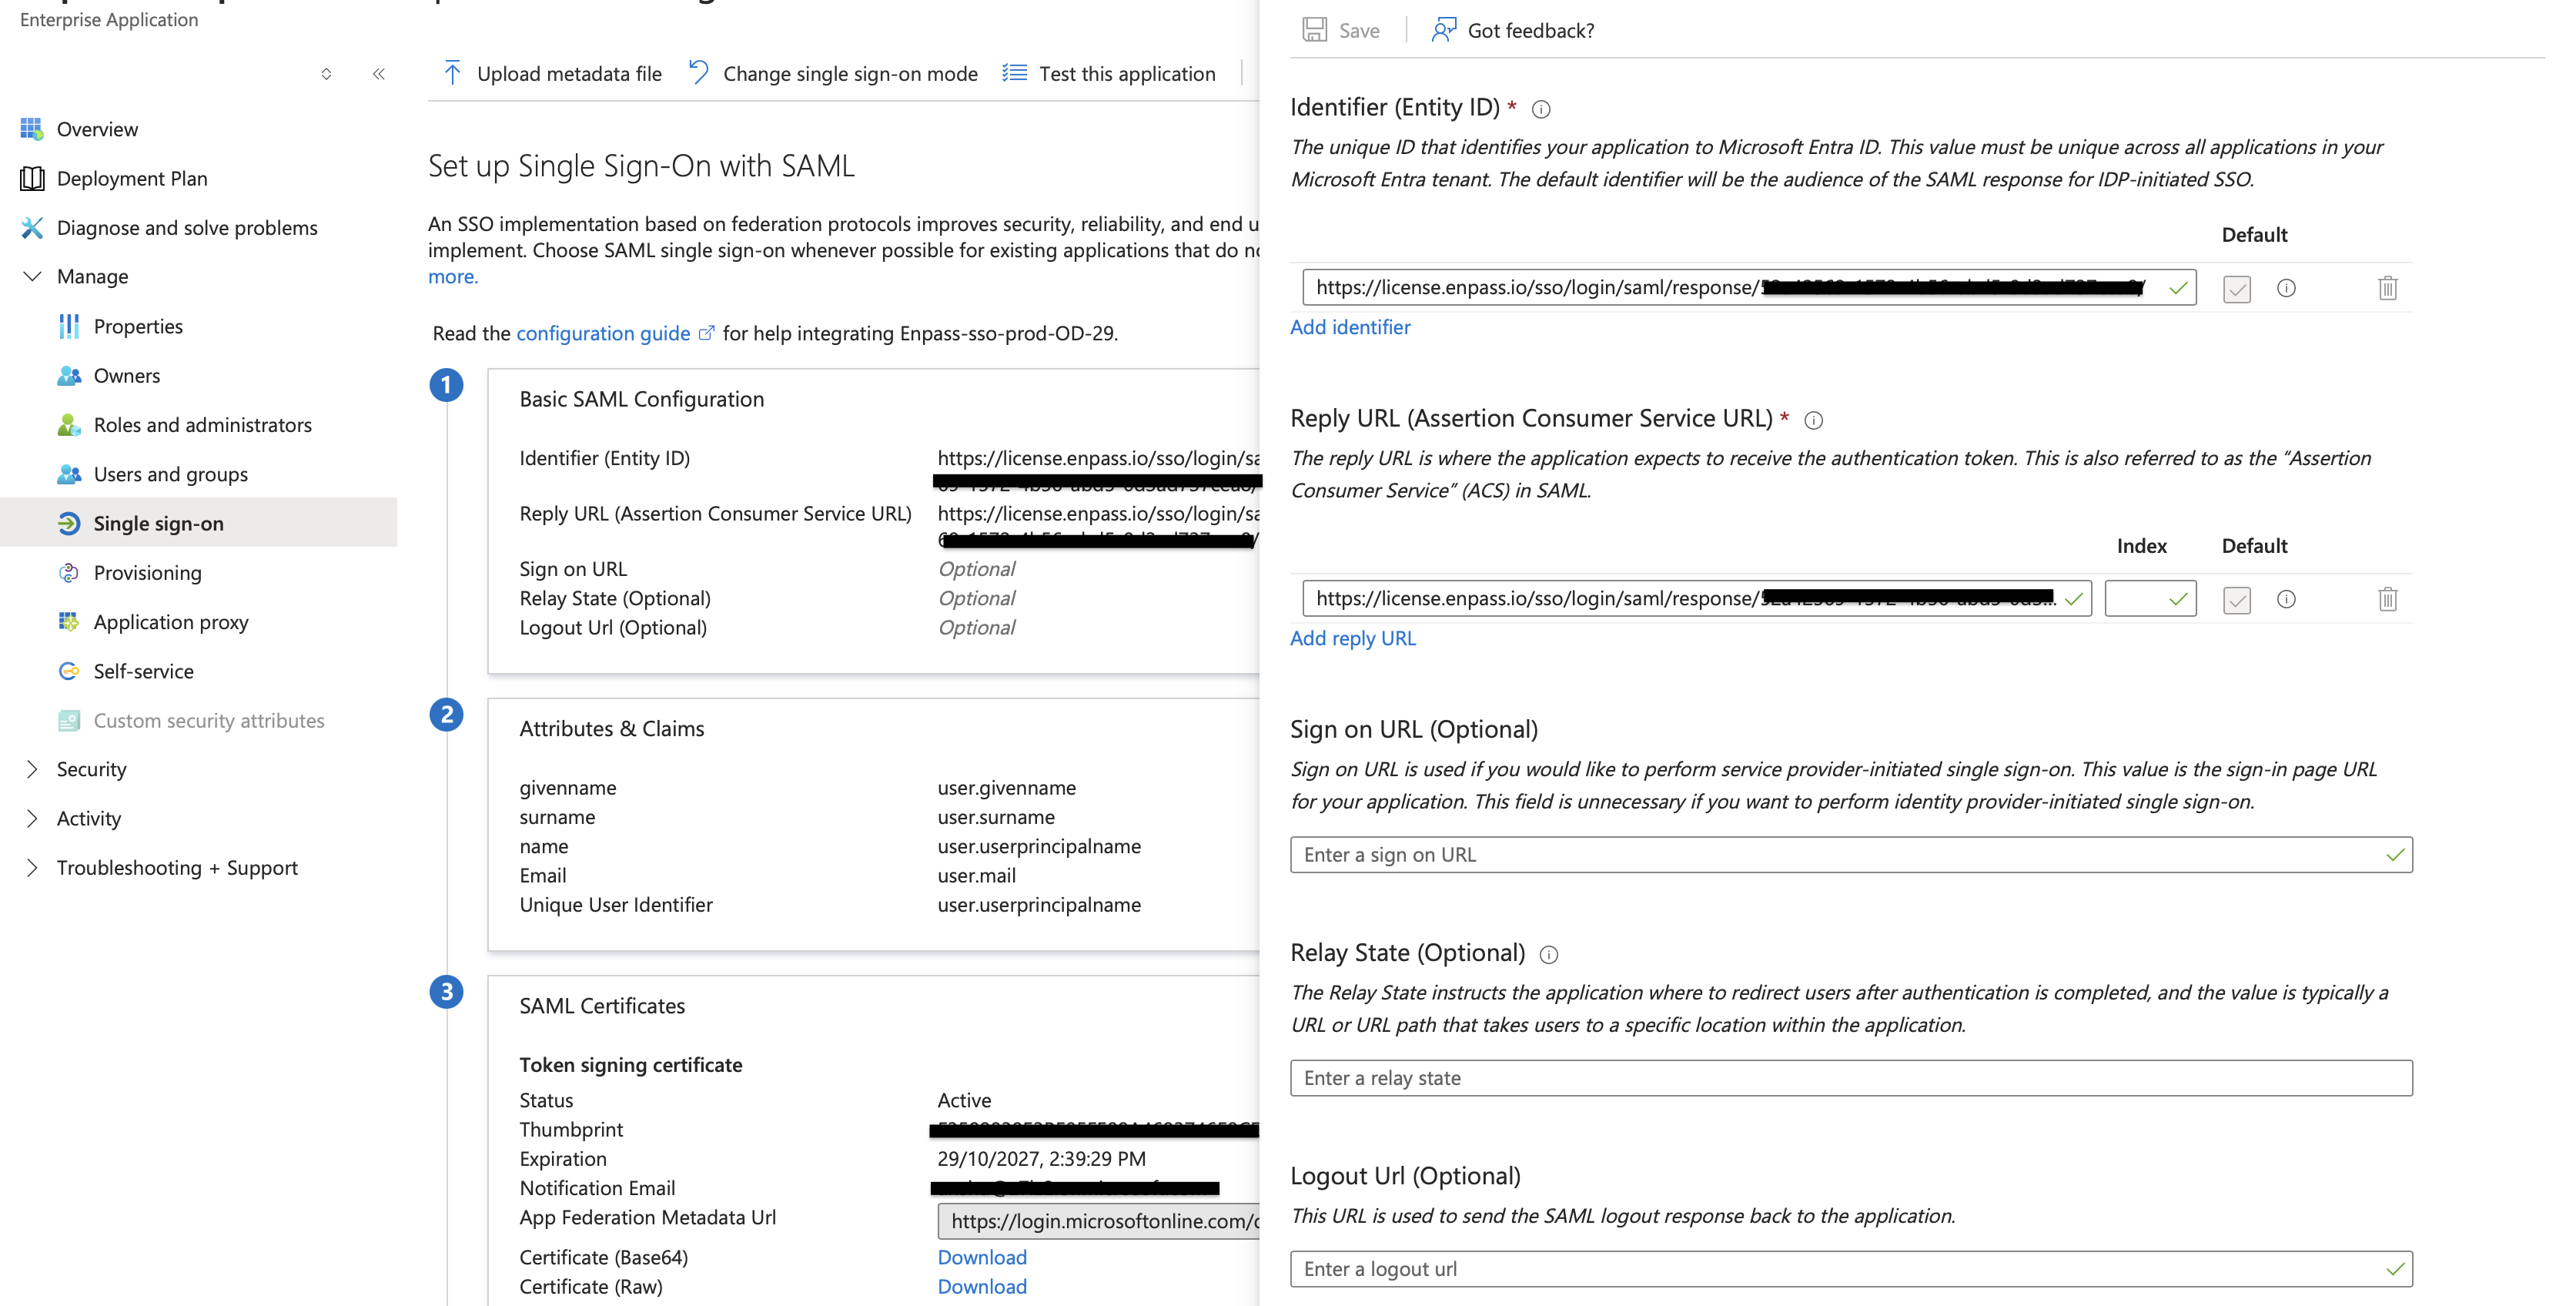
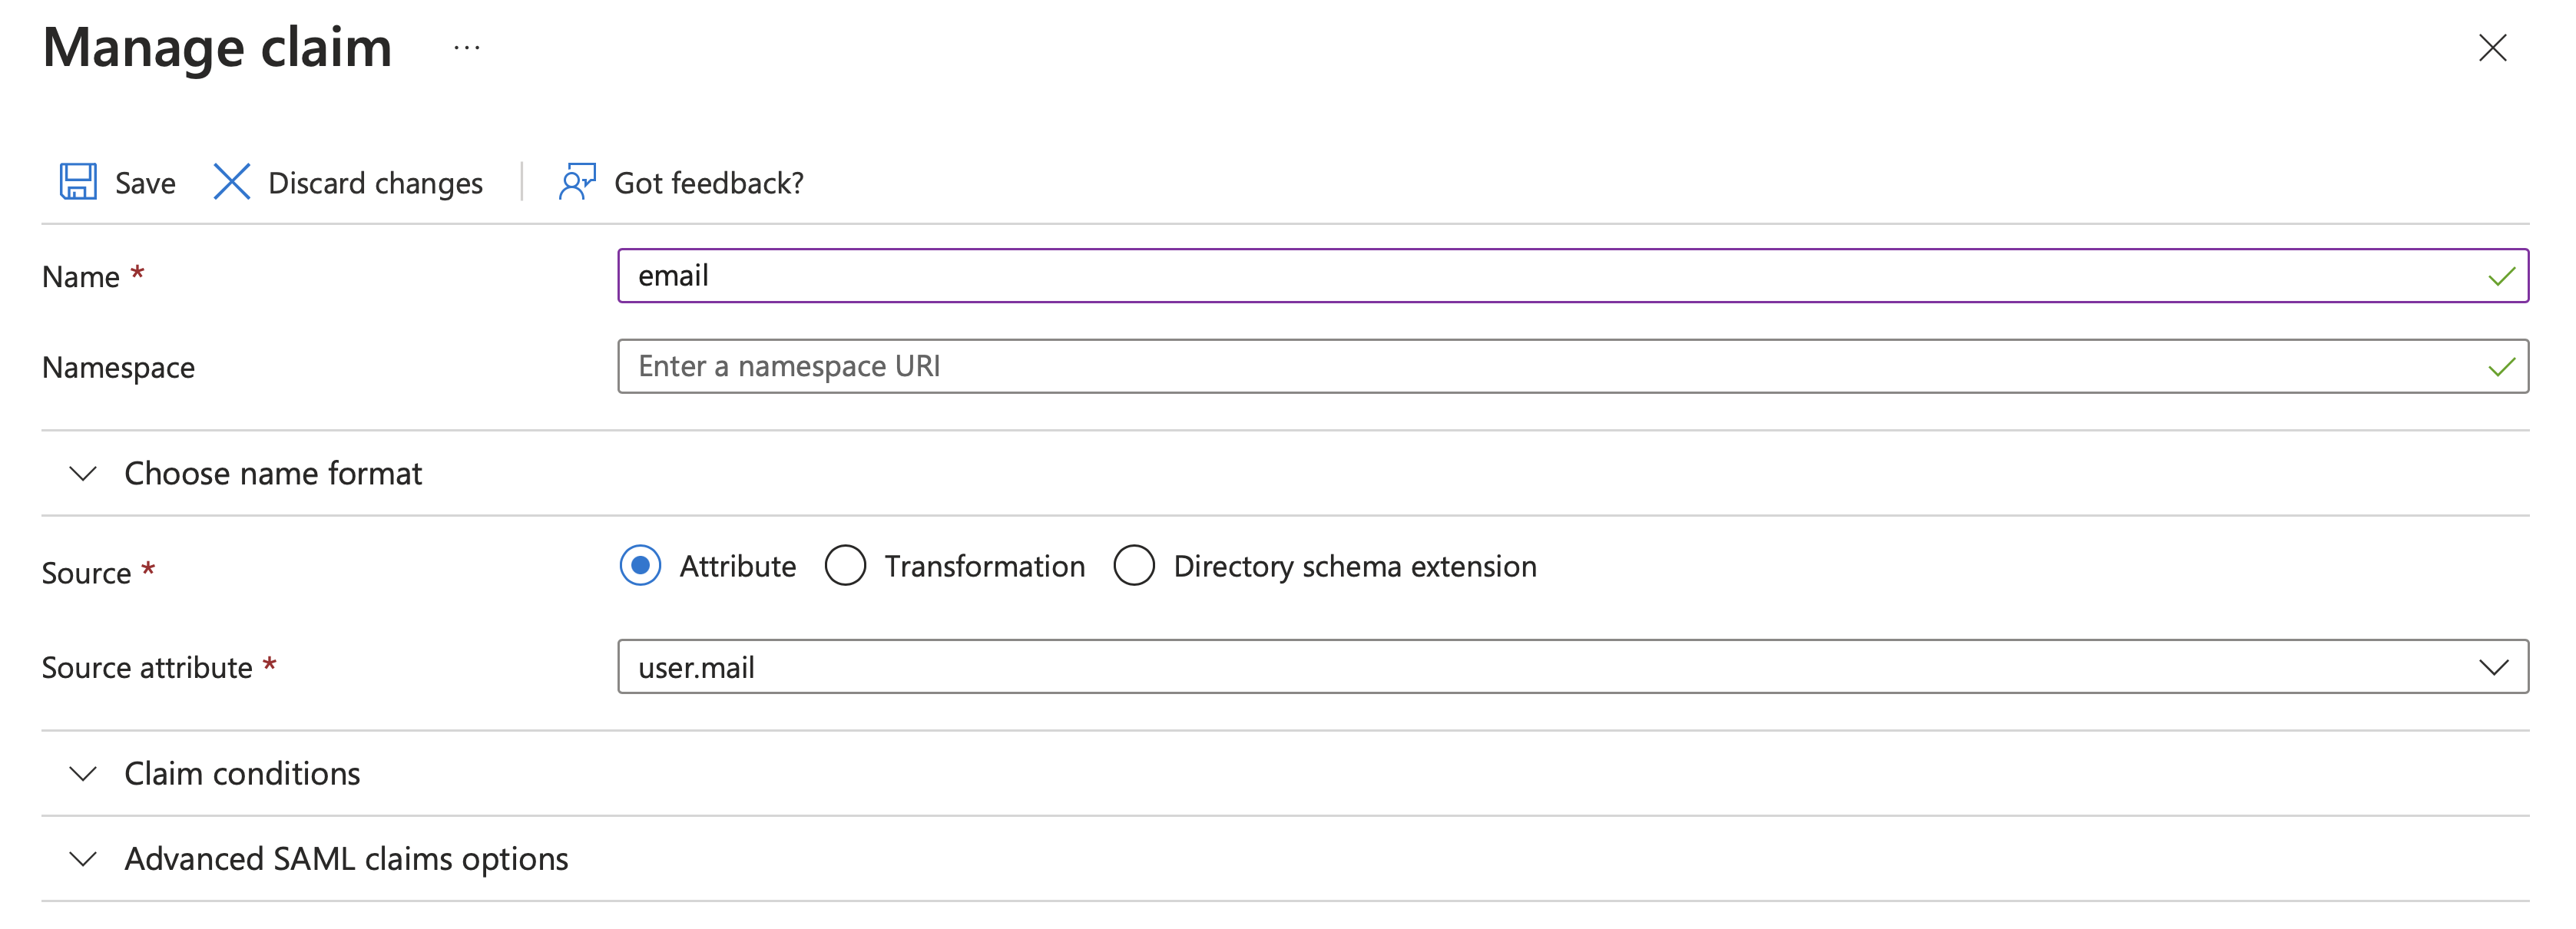
Configure Attributes & Claims
-
Under Attributes & Claims, click Edit.
-
In the Additional Claims section, locate and click on the claim with value user.email.
-
In the Manage claim window:
-
Update the Name field to “email”.
-
Clear the Namespace field.
-
Click Save.
-
-
Click on the Close icon on the right top corner.
You can safely delete the extra claims other than 'email'.
Configure SAML Certificates
-
Click on Edit next to Token signing certificate and update the Signing Option to "Sign SAML response and assertion".
-
Click Save.
-
Click on the Close icon on the right top corner.
-
In the SAML Certificates section, copy the App Federation Metadata URL.
-
Use this URL to complete the SSO Connector setup in the Enpass Admin Console.
Step 3: Assign Users to the Application
All administrators of the Enpass Admin Console should be assigned to this application to enable SSO login.
-
In the sidebar, under the Manage section, select Users & Groups.
-
Assign Enpass admin console users to the application.