Migrating existing Enpass data to Enpass Business
If you’re an existing Enpass user migrating to Enpass Business at an organization using Microsoft 365 for Business, you’ll need to reset and re-authorize your Enpass app using your work credentials. This is six-step process:
- Backing up your vault
- Making sure the Enpass app is up to date
- Resetting the Enpass app
- Activating Enpass under your work credentials
- Setting up your primary work vault
- Restoring your existing vaults
IMPORTANT: Before you begin, make note of your Master Password, and the individual passwords for each vault, which will be required to restore your data at the end of this process.
Step 1: Back up your vaults
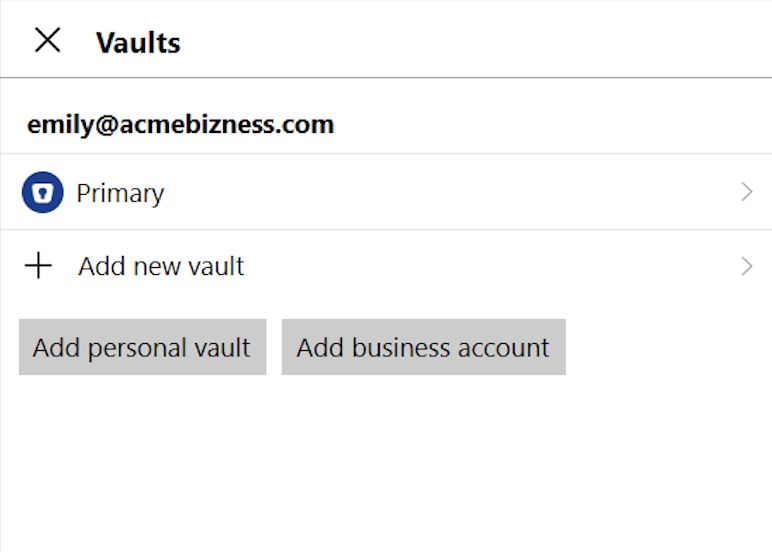
Double-checking your vaults are all properly synced:
- Go to Settings > Vaults.
- Select each of your vaults in turn.
- For each vault, check the Last Synchronized timestamp.
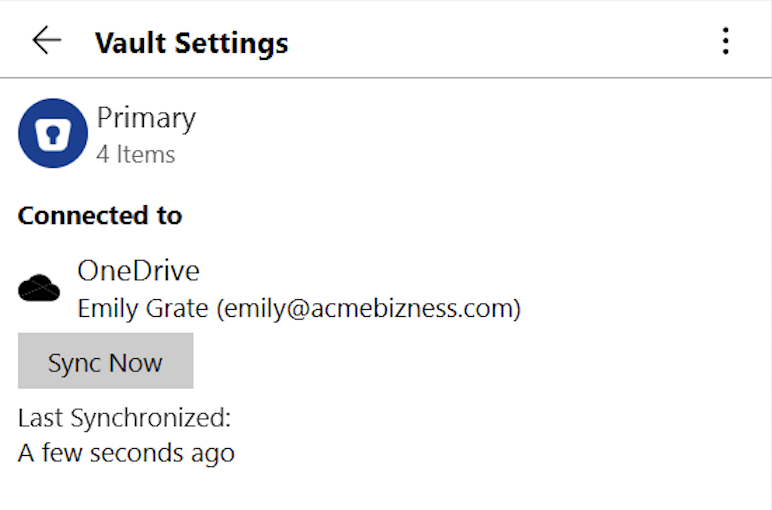
- If the most recent sync is more than a few minutes old, click Sync Now.
- If you’re unable to sync a vault, visit Troubleshoot: Cloud sync and folder sync errors.
Once you’ve repeated these steps for every vault, move on to Step 2: Update Enpass to the latest version.
NOTE: Alternatively, you could create a manual backup of your Enpass data on your local device, which you can use to restore your vaults in Step 5 below.
Step 2: Update Enpass to the latest version
Enpass Business performs best when Enpass is up-to-date:
If you downloaded Enpass from your computer’s App Store:
- Go to the Library (Windows) or Updates (Mac) section of your computer’s App Store, and download any updates you see for Enpass.
If you downloaded Enpass from enpass.io:
- Go to the Help menu, and select Check for Updates.
- If you don’t see Check for Updates or if it’s grayed out, see the App Store instructions above.
- If Enpass is up to date, move on to Step 3: Reset your Enpass app below.
- Click Update Now to download the most recent update.
- In the download progress window, when the download is complete, click Install or Install and Relaunch.
- Launch Enpass, if it does not reopen on its own.
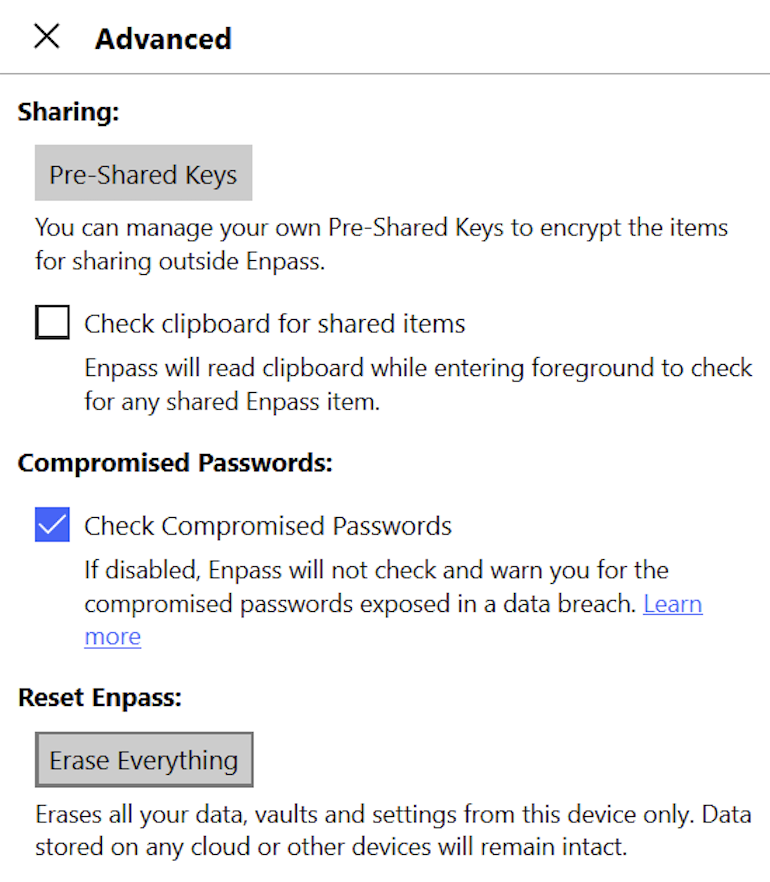
Step 3: Reset your Enpass app
Clearing data from Enpass so it behaves almost as if new:
- Go to Settings > Advanced.
- Under the Reset Enpass heading, click Erase Everything.
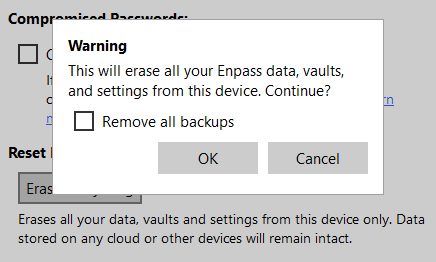
- Enter your Master Password, and click Continue.
- On the warning pop-up, click OK.
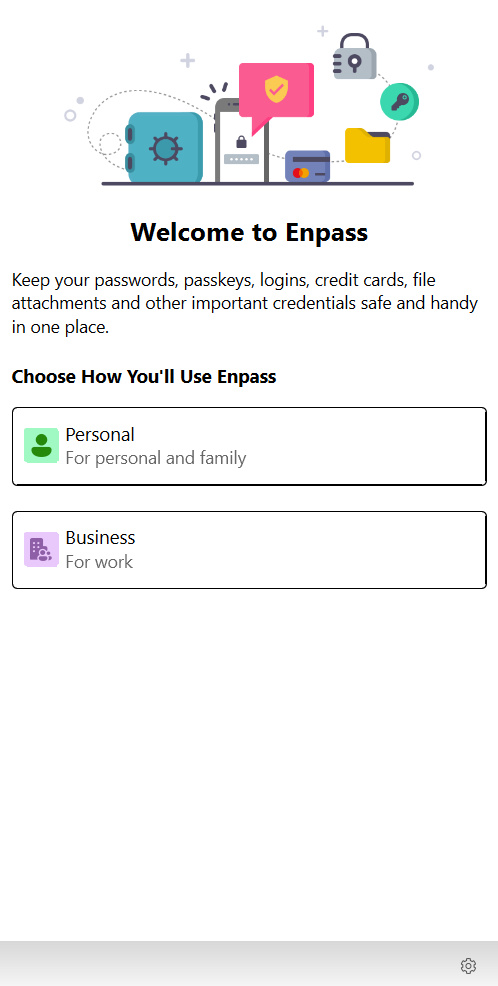
- Once reset, Enpass will default to its Welcome screen.
- Quit the Enpass app (CTRL+Q in Windows; Command+Q in Mac).
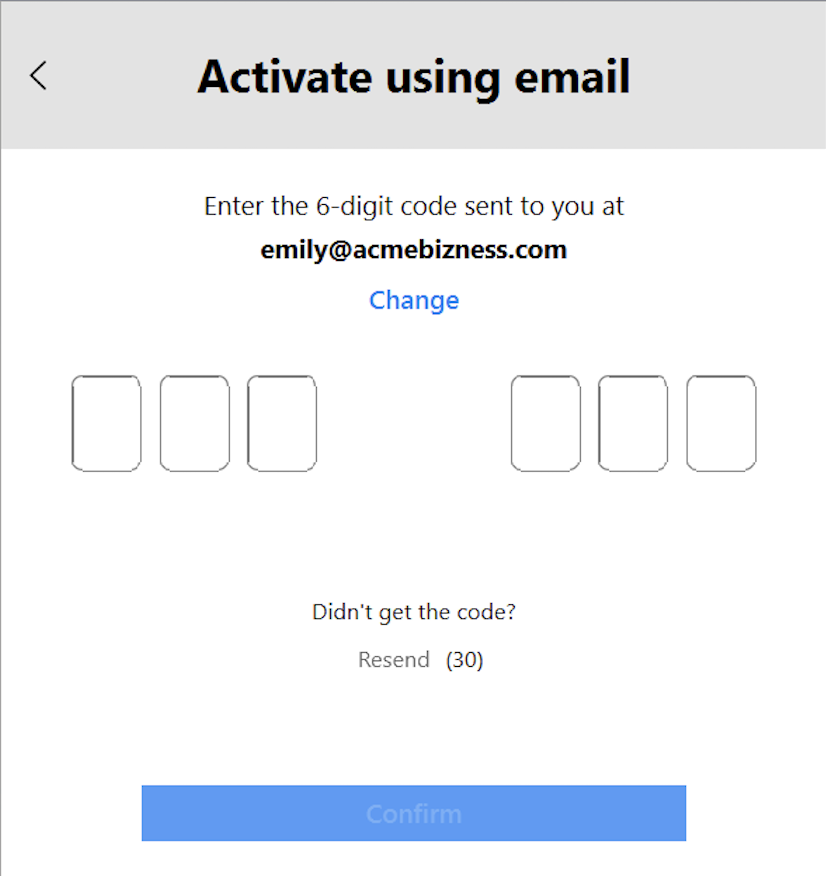
Step 4: Activate Enpass under your work credentials
Registering your app as an Enpass Business user:
- Launch Enpass.
- On the Welcome screen, select the Business option.
- Click Activate using email.
- Provide your work email and click Send Code.
- (Not sure which email address to use? Check with your organization’s Enpass administrator.)
- Enter the six-digit code sent to your email, and click Confirm.
Step 5: Set up your primary work vault
Creating your work password vault:
- Still on the Welcome screen, click Connect to OneDrive to launch a browser window.
- Sign in to Microsoft account with work credentials.
- Grant permission for Enpass to create a vault on your work OneDrive.
- Return to the Enpass app, and create a Master Password for your vault.
- A strong password should combine symbols, letters, and numbers, and should using birthdays, names and other common or public information.
Step 6: Restore your existing vaults
Now that you’re ready to use Enpass at work, add your personal vaults back into Enpass:
- Go to Settings > Vaults, and select Add Personal Vault.
- Select the source from which you want to add your vault.
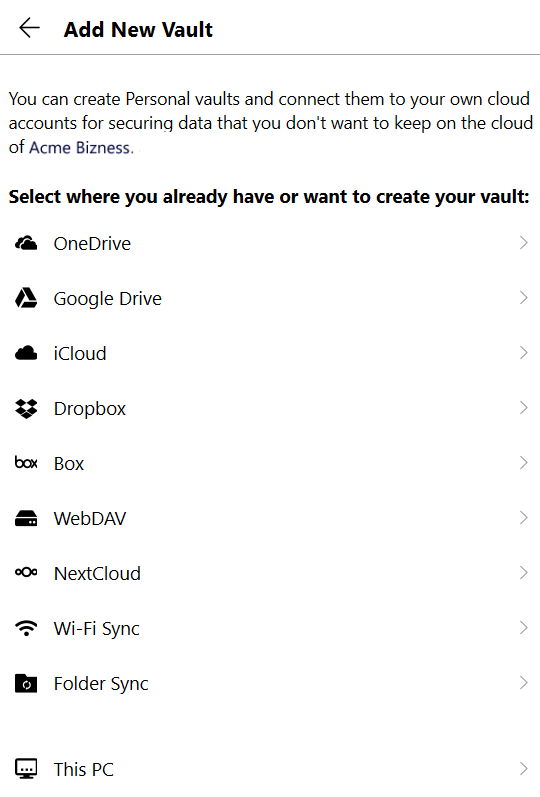
- If that source is a cloud service, your browser will open a special page on that cloud's website for granting access to Enpass.
- Login to the cloud account, and grant access to Enpass (usually a big Grant or Allow button).
- When you see the Enpass-styled "Authorization Finished" message, click the Redirect button and/or the Open Enpass button (if you are not automatically returned to Enpass).
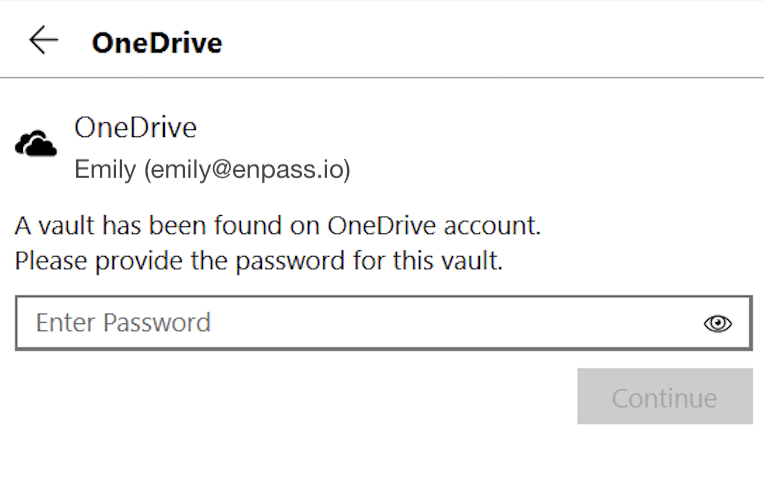
- In Enpass, you will see a "Restoring Data..." message.
- When you see the vault name and icon, click Continue.
- Enter the vault password, and click Continue.
- When adding the vault is completed, click Done.
(To save this new vault's password in your Primary Vault, click the checkbox below the password field.)
Once you’ve repeated these steps for every vault you backed up in Step 1, you’re all set to use Enpass for both work and personal vaults.